

PROJECT MVP - TACTI-COOL BUILD SERIES PART 2 - BOLT DISASSEMBLY
As part of our build series we take a special project on and show you step by step the transformation from plain Jane to Tacti-Cool!
The first step in this Mossberg MVP transformation is to take the rifle apart and completely disassemble the bolt. Above we have a completely disassembled MVP bolt with all of the parts laid out. Take your time and make sure you do not lose or damage any of these parts. Mossberg will not sell you the parts and will make you send the rifle back to them. This is your warning. You can take this information for what it is worth. Do not do this yourself unless your have the capability to do so and always consult a professional when appropriate. It will help you if you have your manual and can reference your schematic and parts list.
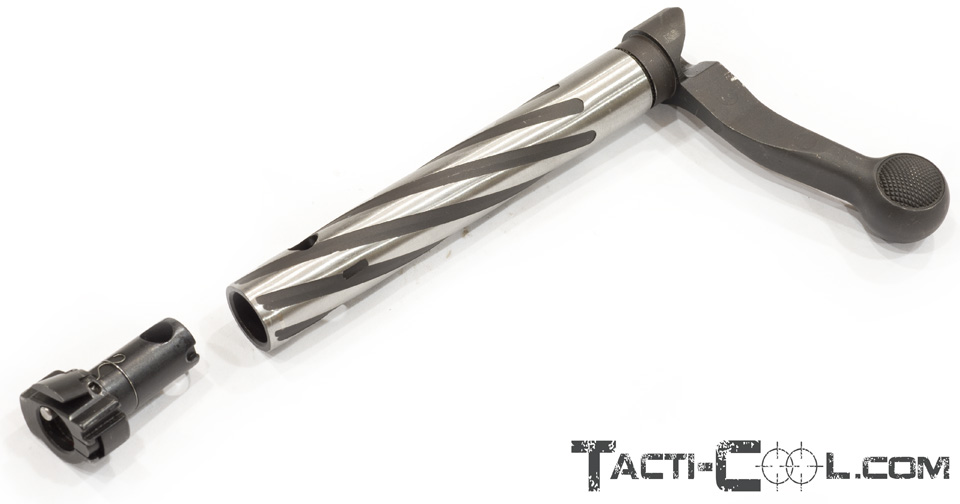
You will first want to remove the striker assembly from the bolt body assembly. This is easy to do if you watch the video. You will want to rotate the striker assembly. You can unlock it from the bolt body assembly by turning it counter clockwise until it snaps loose.

Once the striker assembly is loose simply pull it out of the bolt body and set it aside.


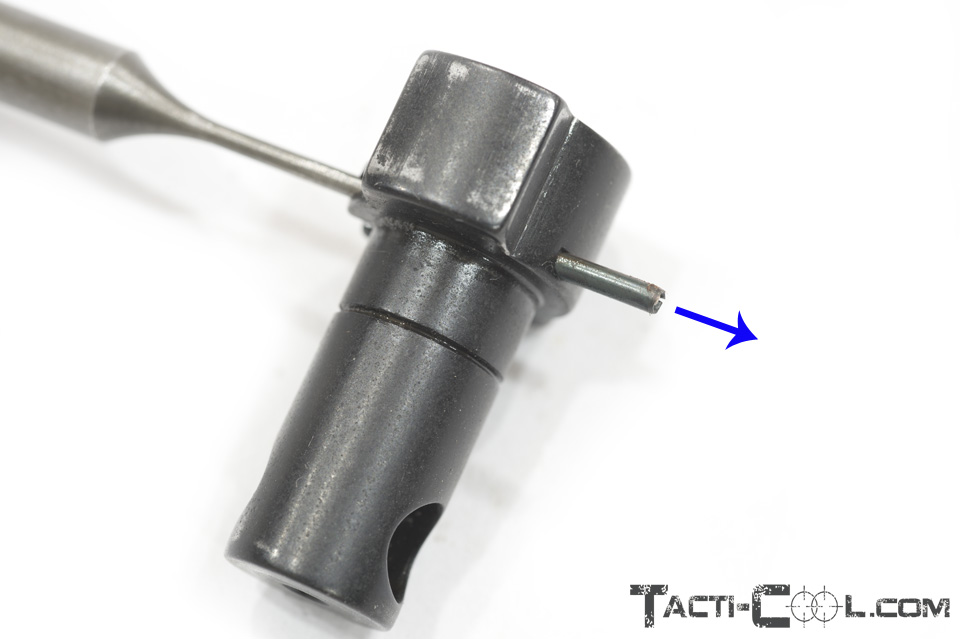
Take your bolt body and remove the bolt head assembly pin (BHAP). Notice in the first picture the BHAP has a hole in the center of of it. The striker actually runs though this when it is assembled. When you reassemble the bolt, make sure the hole is aligned for the striker to run through the hole. Once the BHAP is removed pull the bolt head out of the bolt body.


Then you will take the striker assembly and remove the striker from the striker body. To do this you can gently clamp the striker cup in a vice. To find the striker cup look at the tip end of the striker assembly. Now look at the the base of the striker where it meets the body and runs inside of the striker cup. Clamp the part that looks like it is holding the spring back. Use care and only clamp enough that it will not slip in your vise, but not enough to crush it. While holding the striker collar, turn the assembly counter clockwise to unscrew it. Use care and slightly push into the vise as you turn. When the striker is fully unscrewed from the striker guide the spring will release and want to push away from your vice with substantial force.


Now that the striker is loose remove the striker spring. I would take a look at the striker and it's cup and how they work with each other and how they screw on the spring guide. To put the whole assembly back together you will need to reverse the process so its best to take a look at it now without having to fight that strong spring.


Slide the striker collar off the spring guide paying attention of how it slides over the sear/lug . Use a 3/32" roll pin punch and tap out the roll pin that holds the sear/lug on the spring guide. The roll pin can be removed in either direction but use caution removing it.
Go back to the bolt head and notice how on the base of the head there is a round cut out. Now take a look at the bolt body and notice how there is an indentation near the end of the body. This indentation lug fits in the cutout of the bolt head. There is only one way to properly seat the head on the bolt body. Try it by sloping the head into the body and try to seat it wrong. You will notice it can not fully seat until the lug is mated with the cutout.


Let's look at the bolt head itself and how the o-ring wraps around the head and rides in a groove. This o-ring actually has a slit in it. Make sure to pay attention that the slit is on the opposite side from the cartridge pusher spring pictured far left. You will be able to identify the cartridge pusher spring because it is in the shape of an "M". Take a small pick and gently slip the o-ring at the slit from its grove. Slowly slide the o-ring off the bolt head. At this time the cartridge pusher spring will also most likely fall off the bolt head. Use caution and take care not to bend these two springs.


To remove the cartridge pusher use a 1/16" punch and tap the cartridge pusher pin out of the bolt head.

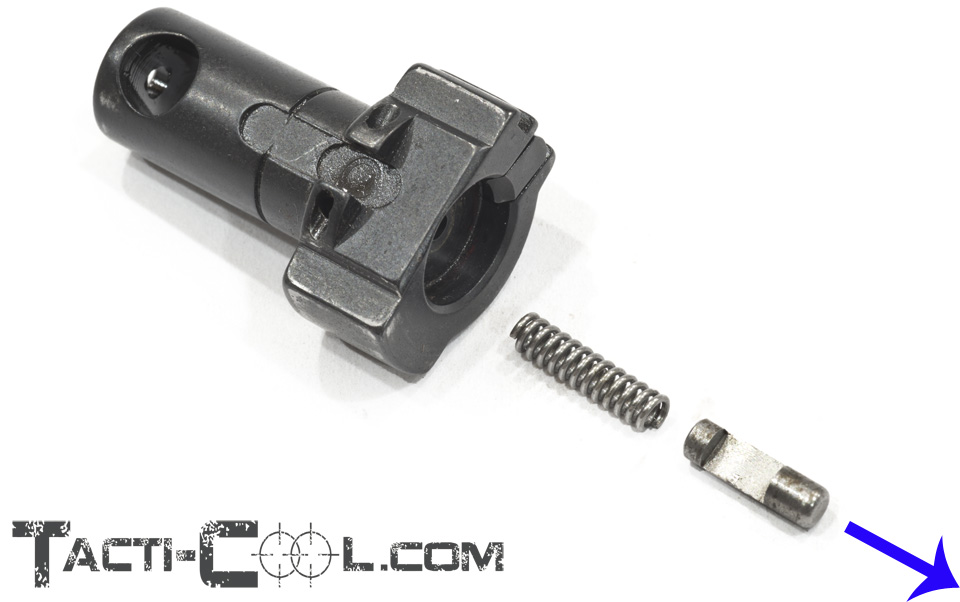
To remove the ejector assembly start by locating the hole for the ejector retainer pin far left blue arrow. Use a 1/16" roll pin punch to tap the roll pin out of the bolt head. Before you remove the roll pin punch put your finger over the face of the bolt head. Slowly remove the roll pin punch and cover the face so that the ejector and spring do not fly away. Take notice of of the ejector and the cut it has on it as well as the direction it fits into the bolt head. The cutout is a relief area for the roll pin and must face towards the roll pin. Even though the roll pin holds the ejector in place, it should also have free movement in and out of the bold head. Also notice on the ejector that the short solid end goes into the bolt head first.
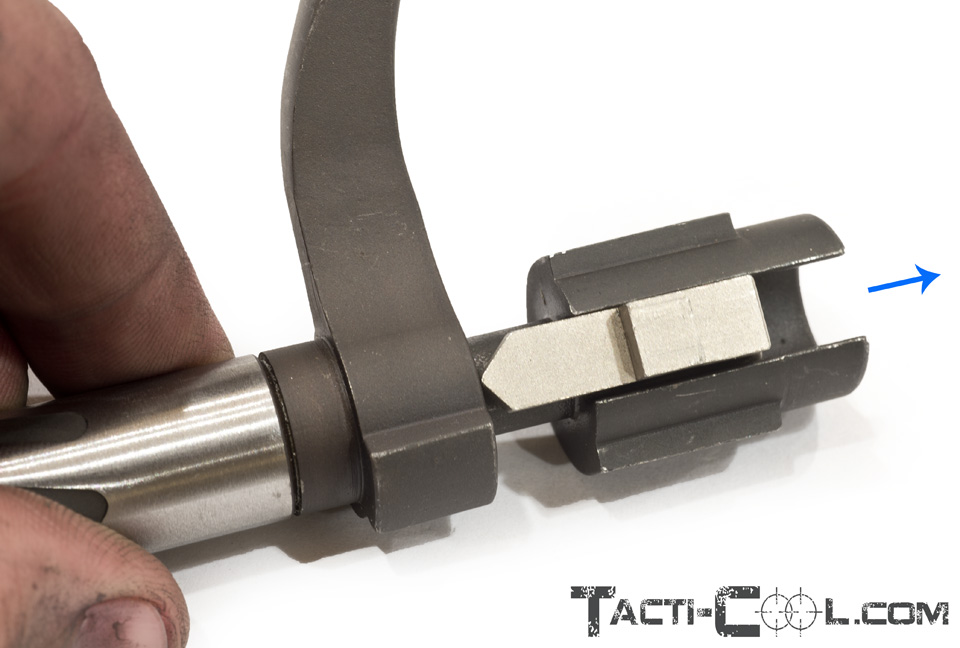
Locate the extractor. It can be identified by its side view "T" shape. The extractor is under tension so use care when removing it. Use your finger to cover the face of the bolt head to keep the ball bearing and spring from flying across the room.
This is an exposed view to show you what to do. Use your finger to cover the face of the bolt head or else the ball bearing and spring can go flying across the room. I like to use a vice to hold the bolt head in a towel so I can just concentrate on not losing the ball bearing and spring during disassembly/reassembly. Use a small flat head screw driver and reach under the extractor claw. Use the screw driver and slowly push the extractor out from the bolt head. Go slowly while pushing into the bolt head to keep the ball bearing and spring from flying out.
Here is what the process should look like if you use your finger to keep all of the extractor parts from flying off. As you can tell by how many times I have mentioned the possibility of these parts being lost you need to take care when preforming this procedure or you can lose these parts. Just ask me how I know.
With the extractor mostly pushed off the bolt head, the ball bearing and spring are exposed. To reassemble the bolt head use your flat head screwdriver to push the ball bearing and spring into its hole while at the same time sliding the extractor back into place.


The ball bearing fits in the base of the extractor and keeps it locked into place. It also gives it spring tension against the base of the cartridge.
A short video showing how to put the striker assembly back into the bolt body. That completes the detail disassembly of the MVP bolt. Now we move onto part three--Adding a Tac Ops oversized bolt knob.


