

UPGRADED XDS UNBOXING & COMPARISON NEW VS OLD
The Upgraded XDS-What Changed
When Springfield Armory announced the XDS recall a couple of months ago I decided to send two different versions from my gun library. The two different models were also each a different generation of XDS. The stainless 45acp was a generation 1 XDS and the 9mm was a second generation plain black. Sending in the different models and versions allows me to see what if any differences there are in the repairs. Both of them were delivered to Geneseo, IL, the city were Springfield Armory is based, on the first morning of the recall on 9/3/2013. The first one was delivered back to me on 10/28/2013. That's 55 days total turnaround. The second will be delivered on the 30th so 57 days for the second. What came today was an 8x8x8 plain cardboard box with a FedEx label attached.
FedEx would not let me deviate from the delivery location or delivery date. I tried to call multiple times and pay extra for faster delivery or just to pick it up at the distribution center but FedEx would not not let me. Springfield shipped the pistol back two day air service. Inside the box was a smaller black pistol case and some papers fliers.


The box contains three pieces of paper. On the left is an invoice of what was preformed on the pistol. Pictured center is a flier reminding you to download the new updated XDS manual. And to the right is a letter from Dennis Reese Co-Chairman of Springfield Armory.
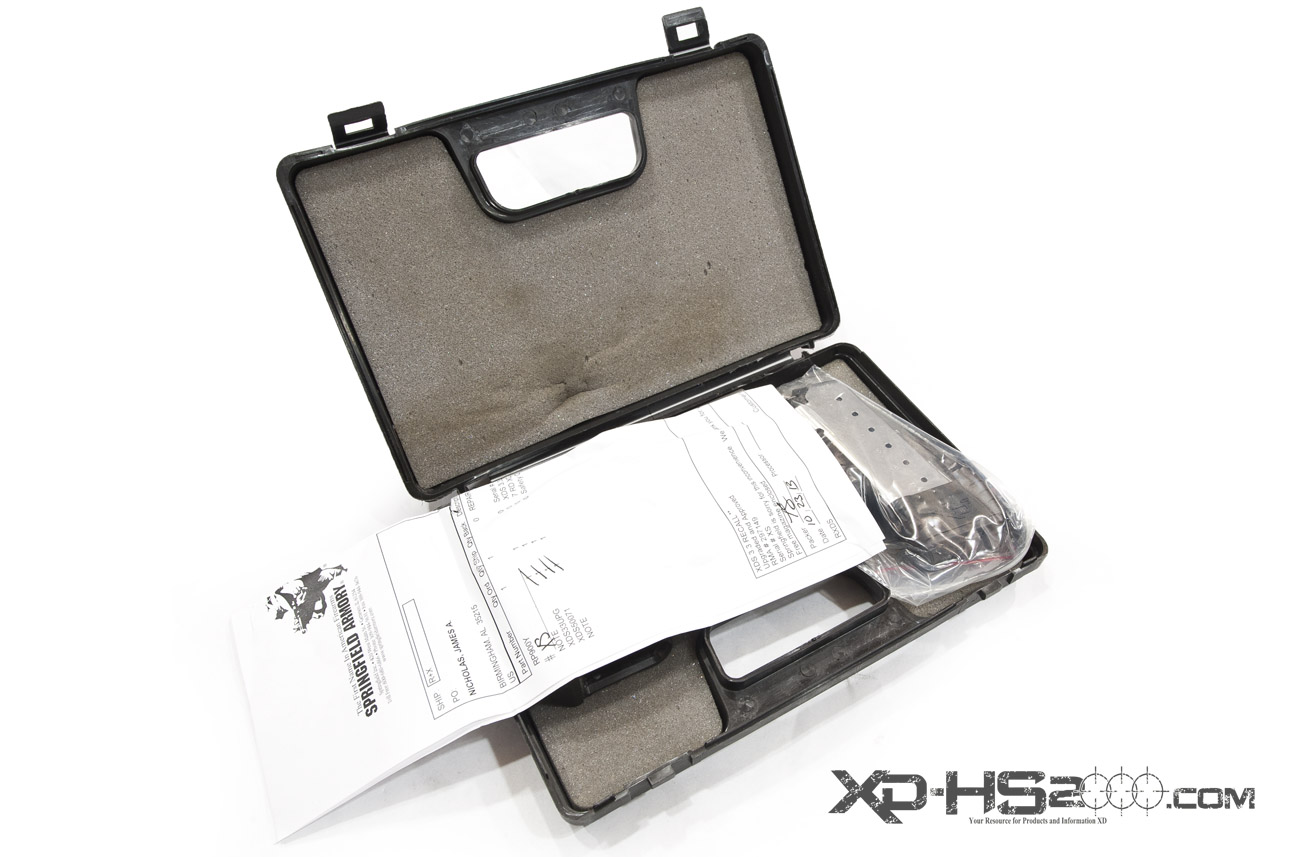


Looking at the black pistol case I can see that Springfield has already adjusted their recall procedures. The very first customers to get their pistols back had a sticker with another pistol's serial number affixed to the outside of the pistol case. Now they are tearing them off and writing the correct serial number with a sharpie on the bottom. These small pistol cases are used by HS Produkt the manufacturer to ship XD, XDM & XDS pistols from Croatia to the United States. Springfield Armory repackages them in the large suitcase style pistol cases for sale in the U.S.
Inside the the small pistol case you will find a copy of your invoice, your pistol with a safety plug in the barrel, wrapped magazine and extra grip. The two different grips fit the different back straps that come with the XDS and are not a mistake by Springfield.
The Pictures to the left will always be the upgraded pistol The pictures to the right will be a pistol that has not had the upgrade preformed on it. Externally you can tell if an XDS has had the upgrade preformed to it by looking at the grip safety (blue arrow). You will be able to see a roll pin in the grip safety. An XDS without roll pin in the grip safety has not had the safety upgrade.
Internally if you look at the back of the frame were the sear housing is you will see two differences as shown by the blue arrows. Remember the upgraded pistol is on the left. You will notice that the upgraded XDS no longer has the arm from the grip safety that rides on top of the sear. Also looking at the sear you will notice it no longer has a cut on it for the grip safety arm.
When detail disassembling each pistol you will notice a major difference. When you pull the upgraded trigger and sear housing from the from the frame. The grip safety and grip safety spring will come loose as soon as it is free from the frame. On the non upgrade pistols the grip safety will not be loose and will be held in place by its arm resting on the top of the sear. The upgrade pistols do not have this upper arm and it is actually alarming when you first experience this. You will probably think you broke something but there is nothing to worry about.
Here is a close up of the sear housing. Please pay attention to the blue arrow. This shows how the shorter arm of the updated grip safety spring rests on the bottom of the updated sear in a little notch area. This spring now not only pushes the grip safety out, but also pushes the sear up in the housing. Pushing the sear up now allows the trigger to reset with out depressing the grip safety and also allows the sear to more positively engage the striker lug. The rest of the disassembly is similar enough to the non upgraded pistols we will not go into it right now
A 360 degree view of the sear and sear spring. The only difference I could find on the sear spring was that the end loop is longer allowing it to wrap around the grip safety pin better. On the sear you will notice that the notch is removed from the to the bottom of the sear. Before the grip safety arm would rest in the notch on the top of the sear allowing it not to move rearward when the trigger was pulled. Now the grip safety arm still blocks the sear but stops it from moving down and off the drop safety area of the sear housing Plus the grip safety spring also now pushes the sear upward from the notch at the bottom of the sear.


The new grip safety spring serves two functions now--pushing the sear up as well as engaging the grip safety by pushing it out. The new grip safety is now a three part assembly with the arm in the middle of the grip safety. The older version was a one piece unit with the safety arm on top. The new grip safety is also thicker from front to back allowing for better engagement while griping the pistol.
The XDS pistol is based off the Glock pistol. Just like the Glock pistol's "trigger mechanism housing with ejector" the XDS's sear housing is actually also a drop safety
Since Glock already describes what happens very well I will just quote them:
The rear part of the trigger bar, which has a cruciform shape, rests with both arms on the drop safety shelf located in the trigger mechanism housing. When the trigger is pulled to the rear, the trigger bar begins to move down off the shelf until finally separating from the firing pin lug. During the slide cycling process, the trigger bar is lifted and caught by the firing pin lug. The trigger bar is reengaged by the firing pin lug.
The XDS does the same thing. Notice the green line on the housing. The crucifix on the trigger bar of the XDS rests on the top shelf when the pistol is partially cocked/loaded. If the pistol is dropped, the trigger bar/sear should not be allowed to move downwards enough to release itself from the lug on the striker. The trigger bar has to move back off the shelf and hit the disconnect. This pushes the sear down releasing the striker. Before, the grip safety arm rode on top of the sear and added a 4th safety to the Glock design by also keeping the sear from moving back at all, unless you gripped the grip safety releasing it from the sear. Now with the upgraded pistols the safety arm is underneath of the sear and keeps the sear from moving same as before. But now instead of keeping it from only moving back, the safety arm mimics the safety shelf (green line) as shown by the red line. When the grip safety is disengaged being pushed out by the grip safety spring, the arm blocks the movement down and is also helped by the grip safety spring pushing the sear up. When you engage the grip safety the arm's shelf is pushed past the sear now allowing the trigger to move the sear back with the trigger bar hitting the disconnect (same as the Glock connector) which pushes the trigger bar and sear off the self allowing the striker to release.
This is a photoshopped image of how the sear, sear spring, safety and safety arm all relate to each other inside the pistol once installed. Note there is a pin that inserts in the round hole portion of the sear spring. Note that the arm of the grip safety is above the pin/spring and underneath the sear
Above is the picture you will need to help you reassemble the XDS sear housing. I photoshoped the grip safety spring so it is bent like it would need to be for reassembly. You could see what needs to happen with the spring and it's alignment. The grip safety pin goes though the springs hole the red arm rides in the notch on the sear as shown by the red line. The grip safety arm rides on top of the pin but below the sear. At the same time you need to get the long arm of the spring to rest on the inside of the grip safety as shown by the blue arm and blue line.
Here is a video focusing on the sear housing and how to put it back together.


